Google Map Durango Journey
Created by Victoria Collette
EDU134, Spring 2010
Introduction| Task | Process |Evaluation| Conclusion | Resources | Teacher's Notes
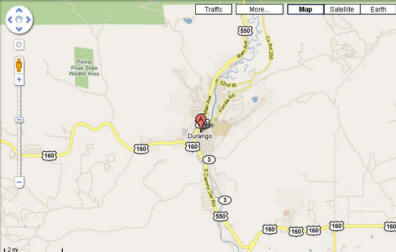
Hello class! Thank you for joining me on our walk around the town. You will visit my house, your house, the library, and then return to school. By the end of our tour, you will have reviewed your computer skills and and you will be able to use Google maps to find your way around Durango and the world!
In your final computer project, you will go to the Google Home Page. You will use the map tools to find the 4 locations in the list. You will send a picture of each location to your e-mail. You will also get directions from your house to the school and from your house to the library. You will copy these into Word and print them. You will staple together the pictures and the directions and hand them in to me.
|
1 |
Go to Google.com. |
|
|
2 |
Click on “maps.” |
|
|
3 |
Type my address in text box. |
668 E 6th Avenue, Durango, CO |
|
4 |
Click “Search maps.” |
|
|
5 |
Click “668 E 6th Ave” in the left pane. |
**You will see the wrong house. You need to follow the arrow and turn the corner to the left! |
|
6 |
Click “Send” to send the picture to my e-mail. |
vlcollette@yahoo.com |
|
7 |
Click “Get Directions” above my address |
|
|
8 |
Type the address of the school in the text box. |
701 Camino Del Rio, Durango, CO |
|
9 |
Click “Get Directions.” |
|
|
10 |
Change “By Car” to “Walking.” |
|
|
11 |
Copy the directions and paste them into Word. |
(Right now you can’t print Google directions.) |
|
12 |
Follow the above directions to go from the school to the library. |
1900 E 3rd Avenue, Durango, CO |
|
13 |
Follow the above directions to go from your house to the school. |
**Use a separate piece of paper for each set of directions. |
|
14 |
Follow the above directions to go from your house to the library. |
**Use a separate piece of paper for each set of directions. |
|
15 |
Staple together the 4 sheets of directions, add your name and turn in to me. |
**Use a separate piece of paper for each set of directions. |
· Computer Access
· Internet Access
· Microsoft Word
· Printer
· E-mail address

|
|
No Response 0 |
Not Proficient 50 |
Proficient 75 |
Highly Proficient 100 |
Score |
Comments |
|
Stated Objective or Performance |
You did not e-mail any photos. |
You mailed 1-2 pictures to me. |
You e-mailed 3 photos to me. |
You e-mailed all 4 photos to me. |
|
|
|
Stated Objective or Performance |
You did not copy and paste directions into Word |
You copied and pasted 1-2 directions into Word. |
You copied and pasted 3 directions into Word. |
You copied and pasted 4 directions into Word. |
|
|
|
Stated Objective or Performance |
You did not change “By Car” to “Walking.” |
N/A |
N/A |
You did change ”By Car” to “Walking.” |
|
|
|
Stated Objective or Performance |
You did not turn in any directions |
You turned in 1-2 sets of directions. |
You turned in 3 sets of directions |
You turned in 4 sets of directions. |
|
|
Congratulations! You have come a long way in your computer skills. Remember when you first used the Internet? Now look at what you can do! You can use Google Maps to find anyplace in Durango that you want to go. You can also find out how long it will take and how far it is. But why stop there? After Durango, the world!
Since this project depends almost entirely on the use of computers in general, and Google specifically, it is critical that the instructor make sure that all computers have access to the required components: computers with Internet access, printers, and Microsoft Word. In addition, you should do the exercise yourself, in case Google is having technical difficulties. As an example, when I created this exercise for my students, the printing option for map directions was down, so I added a copy/paste function.
Also, even though this is a final project for a high-intermediate to high level class of students familiar with the computer you should scan the components and decide if your students have worked with all the various operations necessary for this project. They may need help “turning the corner” to my house or using copy/paste instead of “print.”
You might make the project more relevant for your students if you substitute local sites for the ones I use in Durango. They are, however, more than welcome to use the ones I provide. If you want to incorporate directions and landmarks into this lesson, I have included a few ideas as an attachment. For example, what direction are you traveling when going from the library to the school? These could be used for extra credit.
Students who are disabled can be incorporated into the project in the following ways:
Students can work in groups and pieces of the project assigned according to capability. For instance, they can do various parts of the assignment – even just compiling the directions and handing them in. A student who is not as familiar with computers as another could watch the first few location mappings and jump in when he/she feels comfortable. A student may just offer suggestions about which locations to map.
It is also possible to address multiple intelligences when combined with the project. For instance, a student with high spatial intelligence might help the others with determining directions on the map. A student with logical-mathematical intelligence might be the one to determine what the difference is between walking and driving in terms of distance or route. A student with kinesthetic intelligence could walk the route with a pedometer to determine if the map is correct. There are also questions geared for picture intelligence (or some handicapped student); a student could answer questions about the photos – “Are there cars in front of the house? How many? What colors are they? What time of year is it? Etc.)
You can tweak this project in many ways to use the various capabilities and intelligences of your students. They will have fun and so will you!